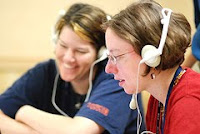
 Last week I conducted a digital storytelling afternoon session with three teachers.
 The session came about as a result of school learning team meetings back in June where "a sequence of photos that tells a story" was identified as the writing topic. You'll see the description of the writing task in this framework listed under the Media/Graphical heading. The category is Electronic.
Here are the steps we followed during our afternoon session.
1. I provided a laptop and a headset [microphone equipped] for each of the three teachers.
2. We worked in a teacher work area which minimized the sound distractions when recording the narratives.
3. We started with the written narrative. The group wrote mentor texts at the beginning of the session. They used personal photos as the visual to spur the writing. Three separate paragraphs were written with the following headings:
a) Infant/Baby
b) Pre School
c) School Age
The personal narratives described what may have been happening in the photo at the time it was taken, the other people in the photos and a number of different personal reflections.
4. After the narratives were written we printed hard copies. I've found that having the printed copy in your hand is a good way to go. The reader can read the story to get comfortable with the text before recording.
5. Once the teachers were comfortable reading the text we recorded each narrative using Audacity software and "Exported to .wav" to save the file. I like using Audacity to record the narrative. Audacity gives a clean and clear voice file. As well, we can use audacity to edit out any other sounds during the recording, like when the bell rings or when announcements are read on the P.A. system. With this voice file we can then import it later into the "movie making" program.
6. After we recorded our voice files, we headed over to the library where there was a computer and a scanner hooked up. We then scanned the three photos which had been brought to the session. I like to scan directly into Adobe Photoshop 7.0 because then you can edit and resize or crop the photo so it is not too big. One rule of thumb I use is adjust the photo to 640 x 480 as this is the size Windows Movie Maker likes.
7. With our voice files and photos ready we placed them in the correct folders to get started. This is important as Windows Movie Maker works best with the component parts or raw materials (the audio files and digital still files) in the right place. Here is the path for best results:
i. Photos: My Documents > My Pictures
ii. Audio Voice Narratives: My Documents> My Music
For some reason when you use Movie Maker to import these files, the default folder is always in My Documents.
8. We then opened Windows Movie Maker and saved the project. Again, the "save default" is My Videos. So you'll need to navigate to the correct folder to save if it doesn't point to My Videos when you click Save Project.
9. In Movie Maker we imported the digital still images and the voice files then dragged all the component parts down to the timeline.
10. The most interesting part of the process is matching the voice narrative with the images on the screen. This can be challenging. The trick is to adjust the amount of time the image stays on the screen. Movie Maker has a numbered timeline to make this easier.
11. We added a title at the beginning of the story and a few "fade" transitions along the way, and our digital stories were complete. Note: It is a good idea to do this along the way because when you add the transitions and titles at the end of the process it alters the voice/image sequence.
12. The final step is to "Save as Movie" During this process all the digital artifacts, voice, images, transitions and titles are rendered into one .wmv file which can then be played in Windows Media Player.
Next steps: Now that the teachers have the hang of it, we'll be conducting computer lab sessions with the students next week to give them the opportunity to create their own digital stories.
I'm looking forward to the next step in the process, working with teachers and students.
Photo Credit: Torres21 ; Creative Commons
